Do-it-yourself bugs from turtles for cobs. Do-it-yourself turtles for cobs with photos
Each of us has a mandrevnik alive, and in order to continue the reception from the happy days spent at the seaside, we are now brought to suffocating places with little fortune-telling - garnishes kamintsi those turtles. And since everything is prosaic with the first ones - their place in cursed vases or else fish aquariums With others, fantasies can run wild. Let us breathe life into sea shells!
Everyone needs order
We will clean the cob. If there are no foreign particles or remains of shellfish on the surface, soak the turtles in the mixture to remove chlorine. Go ahead and get rid of chlorine.
Please! If the congestion is not stronger, there is enough time, to remove the dark cast, you will need three hours and additional cleansing with a brush.
To remove live shellfish and their visibly fresh parts, place the shells in boiling water and remove them using tongs. Another way is to warm them up for 30 seconds and then clean the residue in the same way. If the first rounds did not produce results, repeat the process until all the particles are removed. The material then needs to be non-contaminated by rinsing with chlorine.
What and how much
Once cracks have appeared, they need to be sanded. For this purpose, an emery paper or sanding block is best.
Please! To give the sink a beautiful, modern look, you can cover it with a clear window. varnish for nails or furniture or rub with oil/fat cream. If you have chosen a different method, the gluing area will need to be lightened with alcohol first.
Open it firmly
What we have planned for us, bracelets, “dream catchers” and other virobes that are drawn out from the strings, firmly open behind us.
This can be done in two ways:
- Drill or place the turtle on a wooden board and glue it with tape. We take the thinnest drill and make a cut directly on top of the tape, so as not to allow the material to crack.
- Using a flower and a hammer, we cover the sink with tape (paper masking tape), paint a small mark on the embossed side, place it on the top of the flower, and lightly hit it drop by drop with a hammer several times to mark the opening. Then it is gradually expanded with the same flower and awl to the required diameter.
Please! The structure of the shell is tendentious, so in order to avoid splitting, you need to remember a simple rule: the thinner the material, the thinner the drill or the color.
From simple to folding
Working with sinks is not difficult, but will require careful handling. We will show you from the simplest to the most complex variants of viruses. Bracelets and let them work together! Let's look at all the ideas we have.
Frames
Use other farbs to decorate the original ones with sea shells.
We need:
- Muscles of different sizes;
- glue;
- newspaper or some useless paper;
- scotch;
- any additional material for improvement.
Pokrokov's instructions:
- We cover the surface or the mirror surface with paper, secured with tape.
- We sort the material by size.
- We glue the first row from small fragments, the other from the middle ones, then from the largest ones.
- We're going to die until we hang out completely.
Please! As there are clearings between the tiers, they are remembered by their additional embellishments - nylons, starlets, etc.
Panel
We cut out a shape, be it a figure, from a piece of cardboard, make a hole for the skewer, seal it with turtles in any order, so that the gaps between them are minimal. The twine is leaking from the little girl, tied with sour knots, drying - and panel ready.
Vitrilnik
We recommend making a windshield with your own hands.
If you are on the sea coast, do not buy ready-made turtle souvenirs.
Better yet, collect a collection of turtles yourself and make some finely crafted ones with your own hands, a fireworks display!
You will need:
Materials:
- one middle rapan for the body;
- three wooden sticks (thin skewers or nails) for the goldfinch and one for the bowsprit;
- 6 sirniki for reeves;
- a dozen or so small turtles for display;
- threads for rigging;
- a large comb turtle for the stand.
Tools:
- knife;
- Glue (preferably superglue “Moment”, it easily clumps together instantly. You won’t be able to squeeze the turtle all the way to the goldfinch until it sticks!)
Prepared:
As we wait until the end of the day, we divide the sticks into the required sections. The tops for beauty are sharpened with a knife.
Glue to the corners of the window: on the top - small pieces, on the bottom - larger ones.
If you want to make a model that is foldable and beautiful, glue it to the pins and across the cross-beam from sharpened wires at both ends, on which the “rigging” is attached.
For value in places, connect with goldfish and wrap it with a thread. Make sure everything sticks perfectly.


Now we can install the goldfish on the body with rapana.
For durability, it is recommended to insert them into the glued middle of the plasticine balls, and then secure them with dots of glue. Let me check again: it’s important that you take care of your skin. For additional durability, you can glue the lower rails to the body.
In front of the windshield there is a sharpened long stick glued into place - a bowsprit. The front sail is glued to the hull - a jib and staysail, and on the stern of the sail the rear sail is a mizzen. Once everything sticks together, stretch thin white threads between the upper and lower ribs of the leather goldfinch, as well as between the upper ribs of the front goldfinch and the bowsprit.
To ensure that the threads do not unwind, add a little glue. For decoration, you can also glue a number of different-colored tortoiseshell pieces onto the tops of the goldfinches. Finish and glue the glass to the stand. Get ready for swimming!
Lilia

Is it okay for moms to pick up flowers from gifts, or else throw away the dried bouquets? Shouldn’t you hate the little ones? The axis of the decision: choose a bouquet of amazing flowers that will never wither, otherwise you won’t call them piecemeal - this is how the composition looks original. Since you collected colorful turtles from the sea birch, then the idea of a do-it-yourself nest is for you.
For your skin care you will need:
- 5 small turtles for petals;
- a piece of colored plasticine for the middle of the dough;
- Dovga wooden skewer (straight stick, spoon) for the stem.
Prepared virobu:
The turtle petals are inserted with their ends into a plasticine bag and lightly pressed so that they are gently trimmed.
Then we insert a skewer-stem into the bottom of the bag.


The axis and the book is out!
A classic daisy flower comes from so many white-and-white turtles. Ale You can take turtles of any shape or color - combs, toothless; not just white, but brown, orange, erysipelas - and you will have a bouquet of marvelous beauty!
It is also important to note that plasticine bags need to be easily washed and are of the same color. It’s so much more beautiful when you mix a bunch of bright colors around your chest! Create three or five kittens at once - until the babies are ready. And give my mother an unusual self-made bouquet of turtle flowers on Christmas Day!
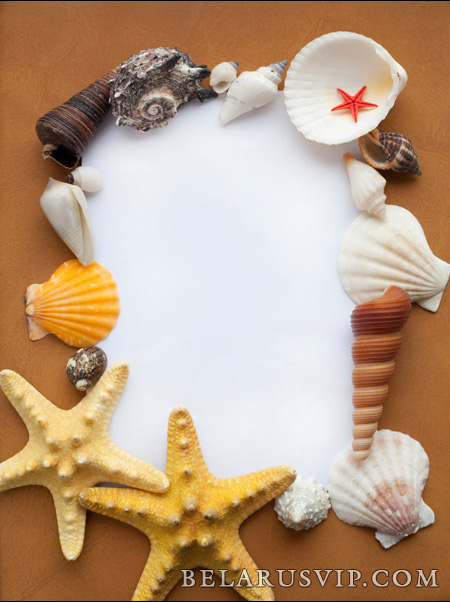
Picture of turtles
Who wouldn't have picked up our mushli! There are a lot of people who collect. And, turning from the base on the birch of the sea and river, bringing new and new exhibits. If you have a lot of such things in your house, this is a topic for you. Try to get creative, get your kids to work and create such a wonderful picture.

Robot head:
Collected turtles (about hundreds) should be thoroughly washed under running water. If you notice a dull coating on your skin, don’t fall for it. It is easy to turn the blisk by brushing the surface with a toothbrush soaked in 10% hydrochloric acid. Sort the cleaned turtles by color and size.
Now you can print the folded composition. Place the turtles on top of the cardboard so as to remove the baby ones. There are a lot of options here, everything depends on the choice of your imagination. Take a primarily organic slope (barred or sunken). Then transfer the shells successively to a plate and seal. Vikorist glue "Moment" especially mitsny. When the composition is dry, cover the shells with 2-3 balls of varnish. Place our work in the frame.
Ideas from the Internet
Panel


These frames are all made from turtles.


Kviti


Tvarini


Compositions


Without a doubt, it will become a self-sufficient color for the interior in a nautical style. But wait, there’s a lot more to be done with it yourself, even if we create with our own hands, we put our soul and imagination into our hearts, and we can create something truly unique from turtles that are so obvious to our eyes, found on the Crimean beaches. arunok, I will stylishly decorate a decorative item.
What can you know on the Black and Azov seas? Three types of turtles are most often caught: rapana, anadara and tritiya:
As a rule, broken shells are found on the beach (to find a whole brine is luck!), But it’s not a problem, as we know, the tricks are also entirely suitable for handling.
Now let's marvel at what You can earn money from sea turtles. Most ideas for crafts were found on www.etsy.com, where manufacturers from all over the world sell goods made with their own hands.
1. Decorate these sea turtles
Turtles are an excellent material for embellishment in nautical style: nastiness, pendants, earrings, bracelets. Depending on your plan, turtles (both targets and bits) can be combined with pearls, nastins and metal pendants.


To prepare the decoration, you may need to make a hole in the turtle. Of course, if you are working hard to finish the job (you are working on your promises), it is best to work hard for the help of the drill. If it’s not a good idea to buy a special tool for you, you can carefully pierce the hole with a gypsy’s nail.
2. Photo frame
By gluing your original photo frame with turtles and other seafood, you will get a great gift that will become a decoration for your booth or an original gift. Such a frame begs to be photographed from the holidays, as the whole river remembers the reception moments of last summer. As in the previous idea, it is good to combine with other materials, for example, the braided rope lace looks beautiful.


3. Wall decor


And here are a couple of other ideas that will complement the interior in a nautical style:

Screenshot covered with turtles:


Decorative dances:


After the summer holiday, we come home to our apartments with a bunch of hot turtles that we collected at the sea and rivers together with our children. What can you do with these turtles? Blessed with monstrous viruses! Such viruses will help you and your children have a fun and enjoyable time, and the interior of your home will be replenished with exciting new viruses. Using turtles you can make paintings, candles, panels and much more with your own hands.
For example, to make a candle from a turtle, you just need to melt paraffin or wax in a water bath, pour it into the turtle and insert a skewer. The axis is ready, that original candle is stylish!
Photo frames for turtles
Photo frames decorated with turtles look gentle and add a refreshing touch to your photos. Photographs taken at sea look especially wonderful in such frames!
To prepare frames decorated with turtles you will need:
please, the turtles themselves,
the simplest, cheapest wooden photo frames,
PVA glue or other glue.
You can also use rags, straw, fireplace and river sand. And then everything is left to your imagination. Just experiment and stick the turtles on the frame. See what photo frames you can make:
 The photo frame is often decorated with turtles, and the main part of the frame is covered with sand. |
 The photo frame is decorated with turtles along the entire perimeter. |
 |
 Photo frame decorated with sea turtles and rhinestones |
Using the same principle, you can decorate a mirror frame with turtles or decorate wall markers
Turtles for virobes can be dried in their original form or pre-farmed.
All you need is a simple structure that doesn’t matter if you glue it together. All you need is mud and hot glue. The turtles stick together in such a way that the puzzle is settled (see photo). Before speech, you can decorate different speeches with turtles. For example, a screenshot for the cost. Decorated with such flowers, the screen will become a wonderful gift for mom!
Virob from turtles - olive

You can make a miracle sheep decorated with turtles with your own hands using clay or salt dough. Such an exclusive olive tree to decorate any table!
To prepare olive sprouts you need:
clay or salted dough,
Fill the mushli with bright farbs. Roll the clay or dough into an olive-shaped olive and decorate it with minced mushrooms, pressing them against the wall of the olive. To be sure, you can coat the skin of the turtle with glue. Now you need to dry the olive so that the olive tree hardens.
Morske saving at the dance
From simple plastic or glass sand, sand, pebbles and turtles you can make a copper virib - a beach near the dance. This virus can be prepared by children of any age. You just need to pour river sand and small turtles into the dance, pebbles and cover the dance with a lid. The axis and everything – the beach is ready to dance! Before speaking, dancing sand, pebbles and turtles in a playground significantly develops fine motor skills.
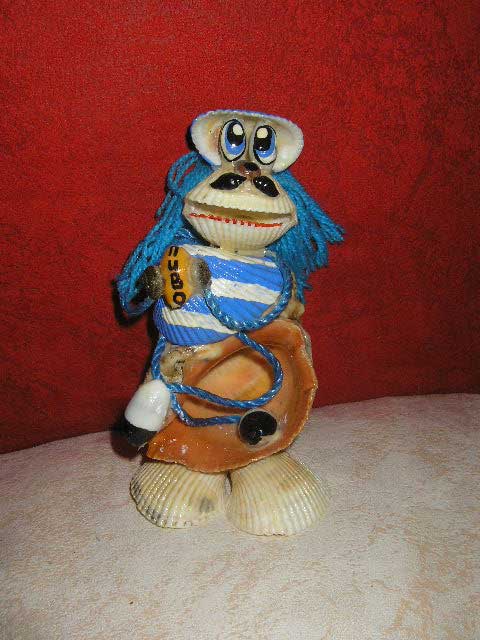
Viral souvenirs from turtles, animals and people
You can make copper souvenirs from turtles for animals or people of different levels of complexity. For example, you can create a turtle to give birth to a territorial child. You just need to glue five turtles at once - one big one like the shell, some small ones like the paws and another one like the head of the turtle. You can paint or stick eyes on the muzzle and attach drops of cardboard and straw to the turtle’s head.
Older children will be more flexible. It is possible that when they are prepared, the help of an adult will be required.

DIY paintings and panels of turtles
Very beautiful decorative decorations for the interior include panels and pictures of turtles. To create such a picture, in addition to turtles, you will need fabric, glue and any other decorative elements, depending on your basket. You can use some of these beads, blades of grass, sticks, sand, fabric, gum... The process of creating a painting on a panel will please both the child and you, and the result will turn out to be the most delightful experience! Hang the finished picture in a frame and on the wall and admire your creations!
You can decorate with turtles in principle!
Who wouldn't have picked up our mushli! There are a lot of people who collect. And, turning from the base on the birch of the sea and river, bringing new and new exhibits. If you have so many of these in your home, this is a topic for you. Try to get creative, get your kids to work and create such a wonderful picture.

Robot head:
Collected turtles (about hundreds) should be thoroughly washed under running water. If you notice a dull coating on your skin, don’t fall for it. It is easy to turn the blisk by brushing the surface with a toothbrush soaked in 10% hydrochloric acid. Sort the cleaned turtles by color and size.
Now you can print the folded composition. Place the turtles on top of the cardboard so as to remove the baby ones. There are a lot of options here, everything depends on the choice of your imagination. Take a primarily organic slope (barred or sunken). Then transfer the shells successively to a plate and seal. Vikorist glue "Moment" especially mitsny. When the composition is dry, cover the shells with 2-3 balls of varnish. Place our work in the frame.
Of course, the composition with turtles will only be based on your creative abilities. Even if you don’t have to limit yourself to a simple view, you can compose the entire picture. You can also make table figurines and souvenirs.


Beautiful virobies from turtles
The time has come for vacancy! Happy people choose swimsuits and pack bags... And even if they have already arrived from the holiday savings with chocolate cream, unforgettable enemies, photographs... And, of course, I want to avoid the tiny stones and turtles, and fights on the birch of the gentle warm sea, with which You can create beautiful viruses.
When we go to the beach, we immediately throw off all our solidity and transform ourselves into great children, just as the little ones will have sand castles and bury the gifts of the sea. So why not pick them up? Smooth pebbles, which are so pleasant to touch in the hands, different colors and little ones... Polished with wiry edges of corals - the hidden underwater kingdoms that we were lucky enough to see... Monster turtles - in a nutshell One can look at them endlessly, so the stench reflects the thoroughness of the forms.
And in our guts there is a growing collection of things that were given to us without cost, and no less valuable souvenirs. Well, since we went to take care of our child, there is no doubt that our luggage will be more than enough treasures. And so – I have a skin trip!
Have you ever wondered how to fix these collections? If we save everything we collect, our house will never run out of space to live! One of my friends guessed: go with your children to nature to “let the stones go”!
Well, I have a different recipe. I collect from little stones and turtles beautiful creatures from the look of pictures that can fit in with a rich interior, a riddle about the unforgettable journey, and can serve as an original one that exists in a single copy, as a gift .
Materials
- Gifts of the sea: stones, turtles, pieces of coral, sharpened sticks.
- Kaheln tiles, monochromatic or with a light, unobtrusive little thing of any size. Many people like us have tiles “living” in their homes that were lost during renovations, which we save in case of any mishap. Possibly, what a shame!
- Frame to suit the size of the tile. The wooden frame, being natural, looks more beautiful. But plastic has the advantage: with it, your picture will be waterproof, and then you can decorate your bathroom!
- Be it a universal glue that can glue “everything to everything.”
- Standard fastening for the frame. Or 4 nails, a paper clip, a hammer, pliers, two small screws.
Robot order
- The most important thing is to consider the composition. The most harmonious composition is to create a picture as a picture, rather than as a simple set of objects. Therefore, give this stage maximum respect. Play with the objects, applying yourself, so that the smells are placed on the slab in a beautiful group. When laying them out on the slab, do not forget to place a frame on it, so that the pieces are also part of the composition. Avoid direct symmetry, but try to align objects, avoid the accumulation of small details on one side of the picture and large ones on the other. Visually add important objects at the bottom so that the picture looks more stable. Check the texture and color of objects. Roll them over the surface, replace one with another until you are satisfied with the result.
- Now, one by one, lift the objects, coat the bottom with glue and turn on the spot, stitches, so that they occupy the correct position and the harmony is not disrupted.
- Insert the picture into the frame using special fasteners or just 4 nails, driving them flush against the tile.
- Attach a loop to whichever picture is hanging - the fastening is often sold complete with frames. If you don’t have a ready-made loop, you can easily make a mittens, a winding picture, a loop from an original paperclip and screw it to the top bar of the frame with small screws.
Now you know how to deal with turtles. Good luck!
We recommend making a windshield with your own hands.
If you are on the sea coast, do not buy ready-made turtle souvenirs.
Better yet, collect a collection of turtles yourself and make some finely crafted ones with your own hands, a fireworks display!
You will need:
Materials:
- one middle rapan for the body;
- three wooden sticks (thin skewers or nails) for goldfinches and one for the bowsprit;
- 6 sirniki for reeves;
- a dozen or so small turtles for display;
- threads for rigging;
- a large comb turtle for the stand.
Tools:
- knife;
- Glue (preferably superglue “Moment”, it easily clumps together instantly. You won’t be able to squeeze the turtle all the way to the goldfinch until it sticks!)
Prepared:
As we wait until the end of the day, we divide the sticks into the required sections. The tops for beauty are sharpened with a knife.
Glue to the top of the window: on the top - small pieces, on the bottom - larger ones.
If you want to make a model that is foldable and beautiful, glue it to the pins and across the cross-beam from sharpened wires at both ends, on which the “rigging” is attached.
For value in places, connect with goldfish and wrap it with a thread. Make sure everything sticks perfectly.


Now we can install the goldfish on the body with rapana.
For durability, it is recommended to insert them into the glued middle of the plasticine balls, and then secure them with dots of glue. Let me check again: it’s important that you take care of your skin. For additional durability, you can glue the lower rails to the body.
In front of the windshield there is a sharpened long stick glued into place - a bowsprit. To this end, the front sail is glued to the hull - a jib and staysail, and on the stern of the sail the rear sail is a mizzen. Once everything sticks together, stretch thin white threads between the upper and lower ribs of the leather goldfinch, as well as between the upper ribs of the front goldfinch and the bowsprit.
To ensure that the threads do not unwind, add a little glue. For decoration, you can also glue a number of different-colored tortoiseshell pieces onto the tops of the goldfinches. Finish and glue the glass to the stand. Get ready for swimming!
For viruses made from natural materials (from turtles), we need additional materials:
- drying glue or plasticine,
- paste for modeling, which lasts for 36 years (for molding various body parts and other elements),
- nail polish (colored and barless),
- Gouache and column pencils No. 0 and No. 1 (for painting eyes, mouth, lips),
- beads, nastiny and sequins (for the eyes of the figures),
- drippings, hair and pieces of lace (for the tail and horns),
- natural material - grains, porridge, droplets of acorns, gills of wood.
And you still need a lot of imagination!
Porcupine Thorn 

The dragon is fidgety. 
Toad Klushka. 

Giraffe Zhenya. 

from the book “Fantasies from Turtles”, Klavdiya Morgunova
Sea, vacation, beach... Three simple words, filled with positive emotions and a fresh breeze. I would like to forget Scholit for a whole river, or even more. I don’t know how you are, but I’ll let you in with the turtles and sanded with salted pine needles of different colors. What good does all this do, the answer is simple - .

Turtle trees decorate a coffee table and save more than one fortune, and save more than two fates - it’s not for nothing that you spent the whole day wandering around the beach in search of unique specimens of sea shells.
For topiary with turtles we need:
- cone made of cardboard or plastic;
- 5-10 cups of turtles;
- glue gun.
Coat the cone with glue and glue the largest turtles on the top, then the middle ones, and then fill the sides with the smallest turtles. It’s a small pleasure - since you don’t have to touch the small gaps between the turtles, you can spray them with white sand - it will also stick to the cone. So make turtles with your own hands You can kindly package it and give it to friends and family.

To collect some turtles, prepare:
- I’ll prepare the coolies;
- assorted turtles of different sizes;
- glue for ceramic tiles (or PVA glue);
- sand;
- spatula, sponge and soft gancherochka.

- Mix a small amount of sand with tile adhesive in a disposable container. І spread the glue onto the butt with a spatula, rub the glue behind a soft gantry to spread the glue evenly over the entire surface of the butt.
- Then proceed until the turtles are glued - don’t forget - pick up the big turtles first, then the smaller turtles.
- Caulk a splint of quills and smooth the surface using a hair sponge.
Candlesticks for turtles
These two wonderful candlesticks were created for romantic summer evenings. I will immediately advance - their preparation will require advanced folding, otherwise the gras will stand a candle.
For candle makers, stock up on:
- two old candle holders
- turtles of different sizes and shapes
- corals
- glue “Moment”


Glue large turtles from the top to the candlesticks, and then coral shells of small diameters. No matter how varied your assortment of large shellfish will be, the candlesticks will be so unique and beautiful.
Bowl of sea shells

What is needed:
- Plate and bowl Bajano made from wood
- putty
- lots of sea shells
- hammer
- sponge
- white acrylic farb
- a bowl of water
Place the stalk on a plate in the sink until it looks like a mosaic. If your shells are large, break a couple with a hammer to reserve the empty shells between the turtles on the platter.
Apply putty to the dish on top of the turtles. Wipe the surface of the turtles with a sponge soaked in water. Then caulk a bunch of quills and cover the putty on a dish with acrylic paste.

Now fill the dish completely, and then you can safely put it in a box and give it to your loved ones, or just decorate a wall or coffee table.
Making turtles with your own hands “Morska Merezha”
This amazing measure is suitable for a little house or baby in a nautical style.

Prepare for her:
- two wooden sticks
- all the threads
- mules with girls
- small drill
Let’s weave our hemlock from the beginning. Drill to make a number of openings on wooden sticks and thread the threads through them, holding them together with knots. You may end up with all the tensioned threads running parallel. Then we will proceed to weaving the transverse threads. There are a lot of them and the stench is even stronger - like vultures. When the border is ready, tie the turtles to it and cheerfully decorate the room.
Turtles and other clues at the jar
I bought hundreds of “pisks and turtles at the dance” type souvenirs from all the small shops along the beach. The smells are all neat and of the same type, and, obviously, the minds are taking revenge on China. So I decided to earn my sweetness by eating and drinking turtles at the souvenir dance on the beach. It's nice to finish it! Try vi.

Pour a little sand from the road into a jar, print your photo from the printer, only on a regular paper, and not on a glossy one. Glue them to the inside of the jar, put the turtle in fresh water and sign it.

Ocean Vase
This vase is even lighter from the viconn. Fill a large wide-necked vase 1/3 with dry sand. Then give the animal clean turtles, sea stars and shells. Check out the treasures you took from the train to the shore, or just bought from the store. Place the vase in the center of the table or on the table and let it make you happy every day.

Candle holders stand apart among the turtles made with their own hands. But I won’t go into foldability, but will simply show you the lightest and tallest candlestick, moreover, the foldable one is already on the cob.

Required materials:
- Pisok
- Vase or bottle
- Svichka
- Turtles

Light the candle in the middle of the vase. Sift the sand around the candle about a third of the way into the vase. Place the mushrooms near the candle stand. You might need tweezers for this.
It will be wonderful if the candle is aromatic - it will make your evening even more romantic.


